In an increasingly digital world, applications often need to send emails for various purposes, from notifications to communication. To achieve this securely and seamlessly, Microsoft Identity provides a robust platform for authentication and authorization. This blog post will share slight insight on the process of setting up Microsoft Identity to enable your application to send emails using Microsoft services like Outlook.
Why Use Microsoft Identity?
Integrating Microsoft Identity into your application offers several advantages:
- Security: Microsoft Identity provides strong security measures, ensuring that only authorized applications can send emails.
- Scalability: You can send emails to a large number of users or recipients without concerns about scaling issues.
- Consistency: By using a trusted platform like Microsoft Identity, you can ensure that your application’s emails are delivered consistently.
This article is divided into 3 parts, In the previous post we created no-reply mailbox.
- Part-1: Administrative rights to Microsoft admin center to create no-reply mailbox
- Part-2: Register your application and provide necessary permissions
- Part-3: Configuring Your Application and Implementing Microsoft Graph API
Registering Application in Microsoft Identity
Now, let’s dive into the steps to set up your application for sending emails.
Step 1: Access the Office 365 Admin Center
Log in to your Office 365 admin account and access the admin center. You need administrative privileges to create a new mailbox.
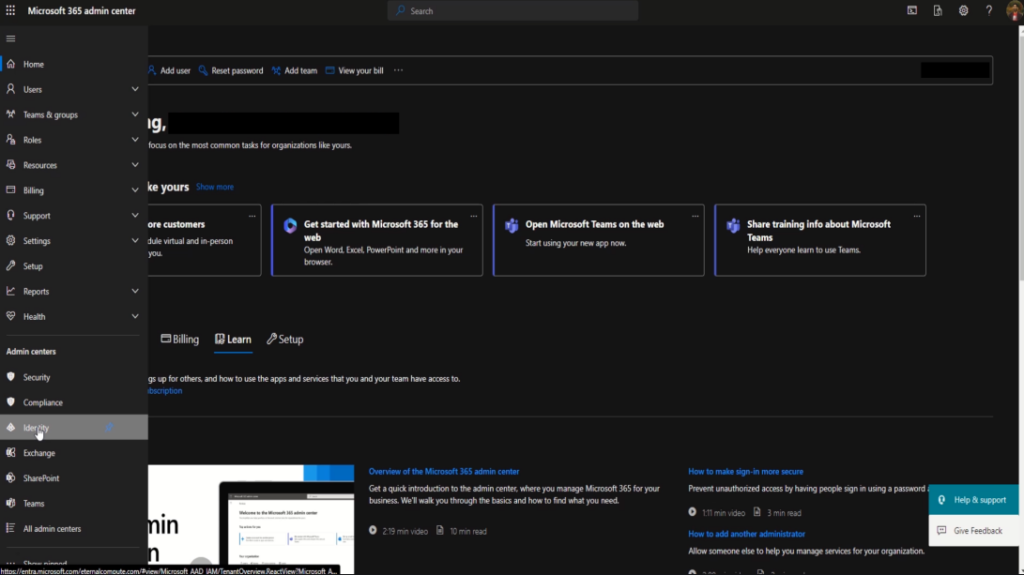
Click on “Navigation Menu” and expand to show all menu Items by clicking “Show all“.
Under “Admin centers” section, select “Identity“
Step 2: Create an App Registration
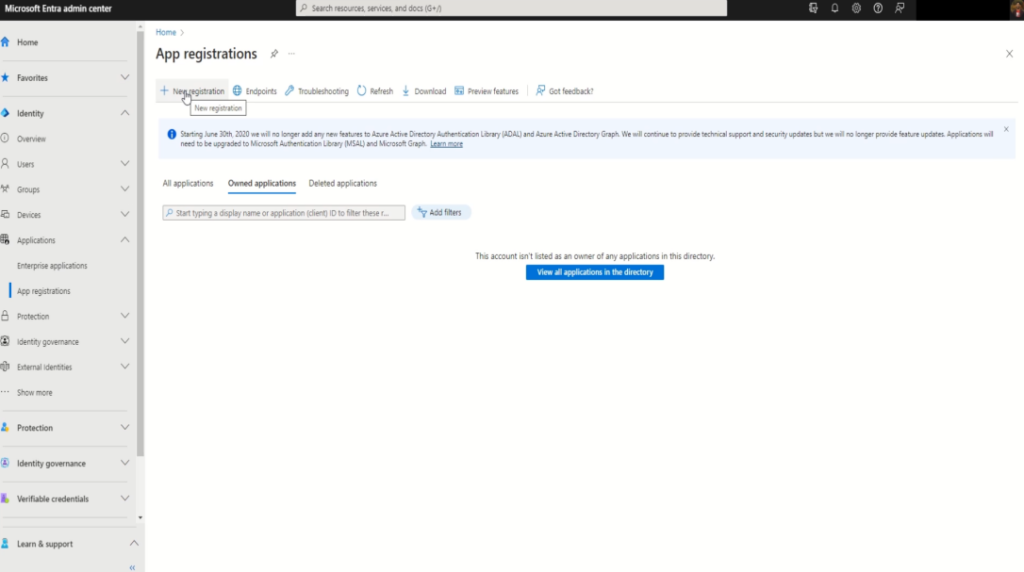
In the left-hand menu, expand “Applications” section, and select “App registrations“
Under “App registrations” click “+ New registration“
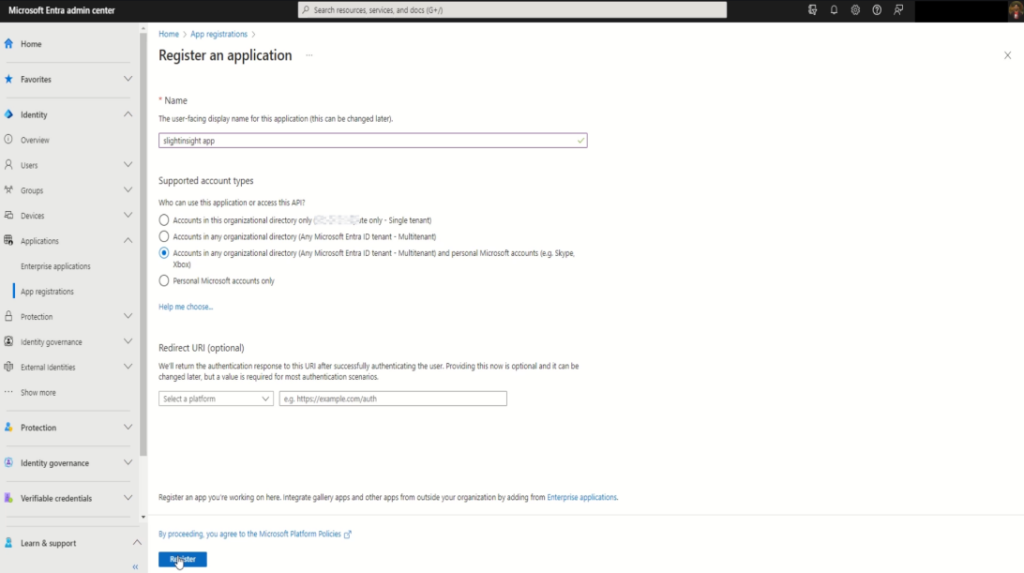
Provide a name for your application, and choose the appropriate Supported account type. For most applications, “Accounts in this organizational directory only” is sufficient.
Enter the Redirect URI, which is the endpoint where Azure AD will send authentication responses. During development, you can use https://localhost as the Redirect URI.
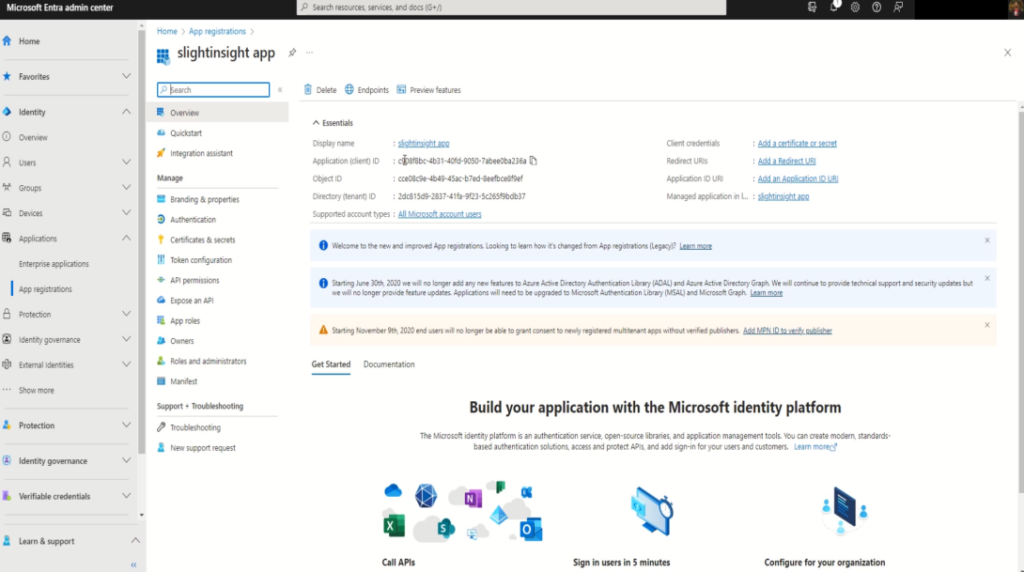
Click on “Register” to create application registration entry.
From the “Overview” section, Copy Client ID and Tenant ID. We will require this for application configuration, so that it can access Microsoft graph API’s.
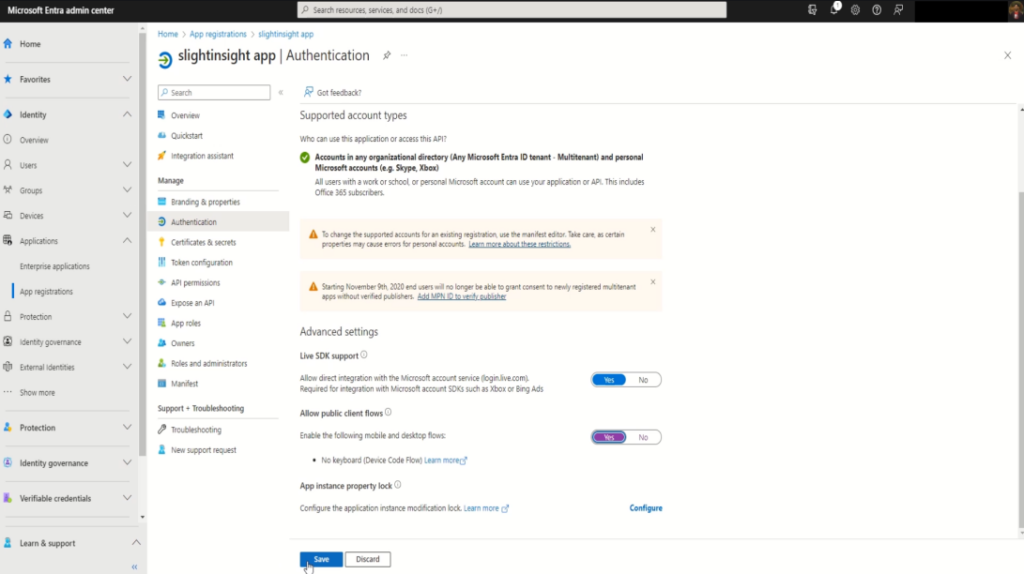
Step 3: Allow public client flow
Under your app registration, click on “Authentication” from the left-hand menu, and scroll down to “Allow public client flow” section.
Enable it by clicking on “Yes” button, followed by “Save” button.
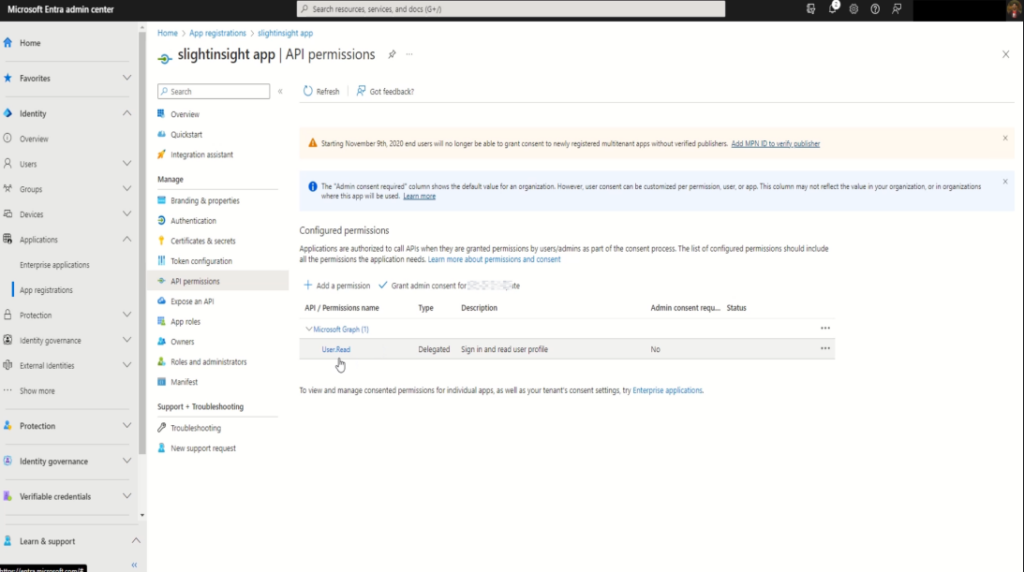
Step 4: Configure API Permissions
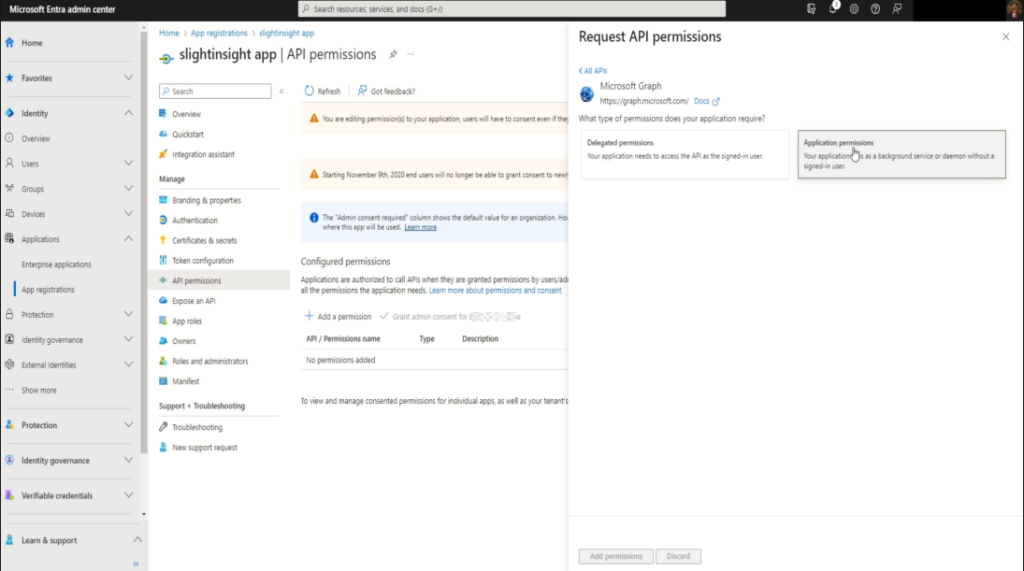
Under your app registration, navigate to “API permissions“, and click on “+ Add a permission”
In the pop-up window, click on “Microsoft Graph” and in next window select “Application permissions“
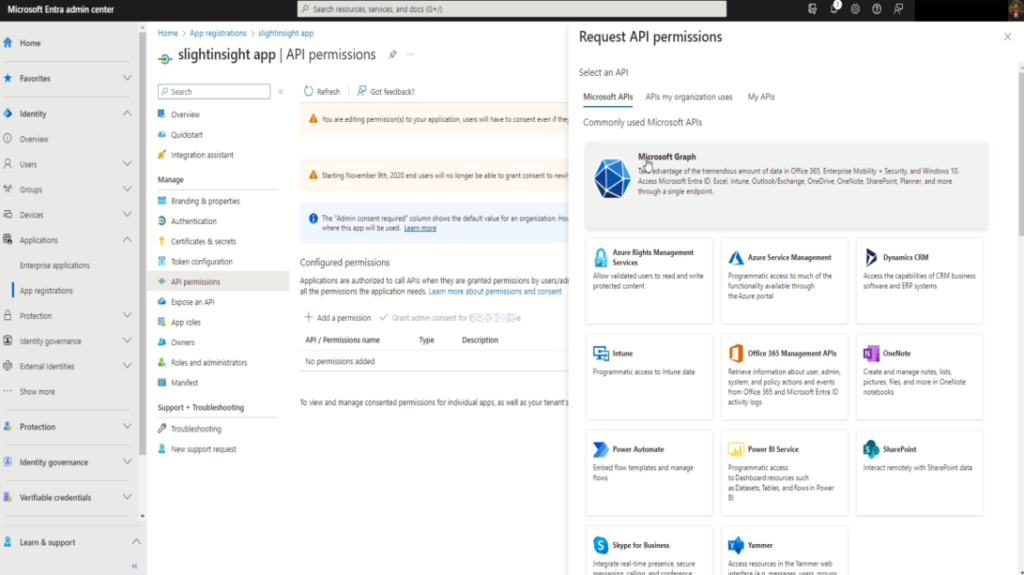
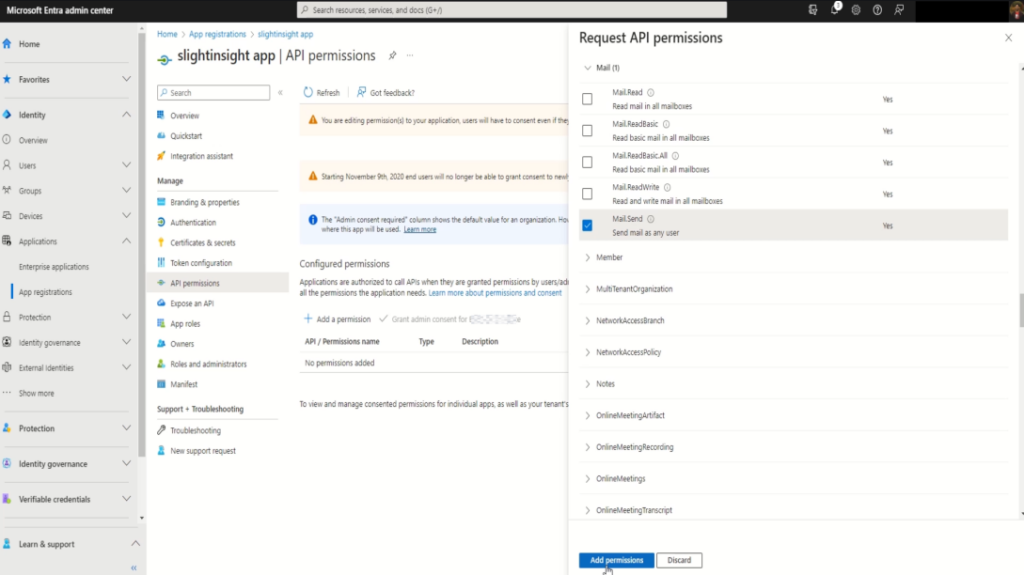
Select the necessary permissions such as “Mail.Send” under “Mail” section for sending emails, and click on “Add Permissions”
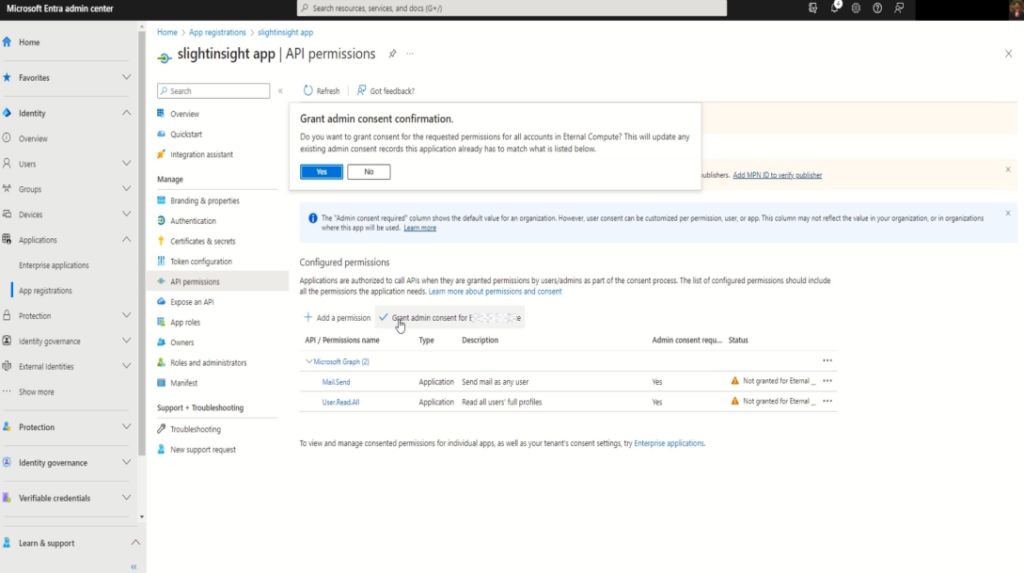
Step 5: Grant Admin Consent
After adding permissions, click on the “Grant admin consent” button. This action allows your application to access the required resources securely.
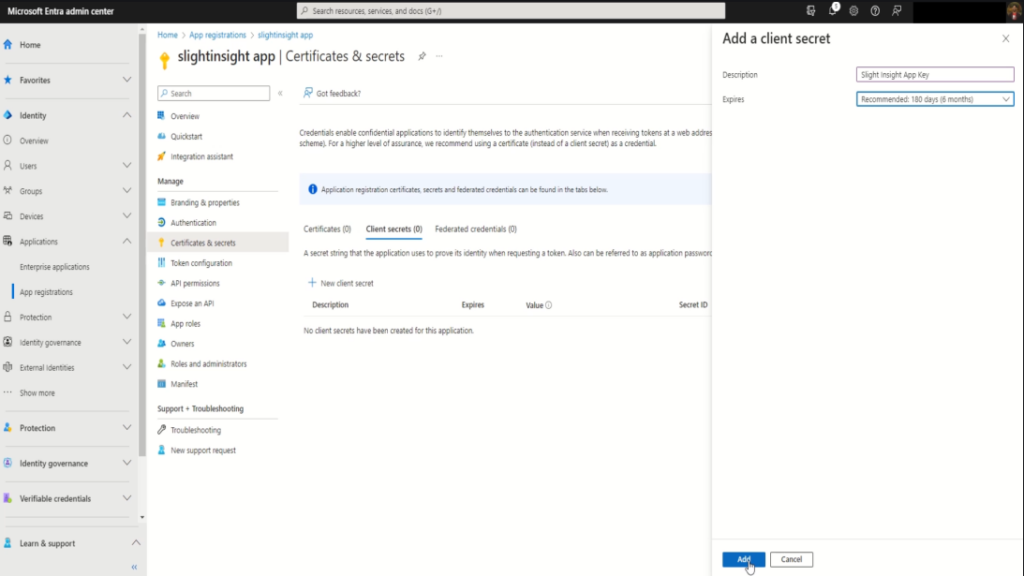
Step 6: Create a Client Secret or Certificates
Under “Certificates & secrets,” you can create a new client secret or use certificates for authentication. The client secret is a secure way for your application to authenticate with Azure AD.
Under your app registration, navigate to “Certificates & secrets“, and click on “+ New Client Secret“.
Provide a description to secret and select “Expires” from available options.
Click on “Add” to generate a new client secret, make sure to save it, as this is the only time it will be available for copying.
Conclusion
In conclusion, integrating Microsoft Identity into your application for sending emails not only enhances security but also ensures the consistent and scalable delivery of messages. By following the steps outlined in this guide, you can set up Microsoft Identity with ease and leverage its capabilities for sending emails from your application.
In the Next post we will show sample spring-boot application that uses Microsoft Graph API’s to send email using no-reply mailbox.


Leave a Reply
You must be logged in to post a comment.