In today’s fast-paced world of email communication, managing your inbox efficiently is paramount. Whether you’re a business owner, IT administrator, or simply an individual looking to streamline your email operations, creating a “No-Reply” mailbox in Office 365 can be a valuable tool. This blog post offers a slight insight into how to set up a No-Reply mailbox in Office 365.
What is a No-Reply Mailbox?
A No-Reply mailbox is an email address that does not accept incoming emails. Instead, it is used solely for sending automated notifications, alerts, and messages. These email addresses are typically used for marketing, transactional emails, or system-generated messages. They are a practical way to ensure that replies to these messages do not clutter your primary mailbox and confuse recipients.
Why Create a No-Reply Mailbox?
There are several compelling reasons to create a No-Reply mailbox in Office 365:
- Professionalism: Using a No-Reply mailbox for automated communications helps maintain a professional image. It shows that you take email correspondence seriously.
- Security: Preventing incoming emails to a No-Reply mailbox reduces the risk of security threats like phishing or malware.
- Organization: It keeps your primary inbox clean and organized. Replies from recipients to automated emails can create confusion and clutter, making it harder to manage important messages.
This article is divided into 3 parts as listed below:
- Part-1: Administrative rights to Microsoft admin center to create no-reply mailbox
- Part-2: Register your application and provide necessary permissions
- Part-3: Configuring Your Application and Implementing Microsoft Graph API
Creating a No-Reply Mailbox in Office 365
Now that we understand the importance of a No-Reply mailbox, let’s delve into the steps to create one in Office 365:
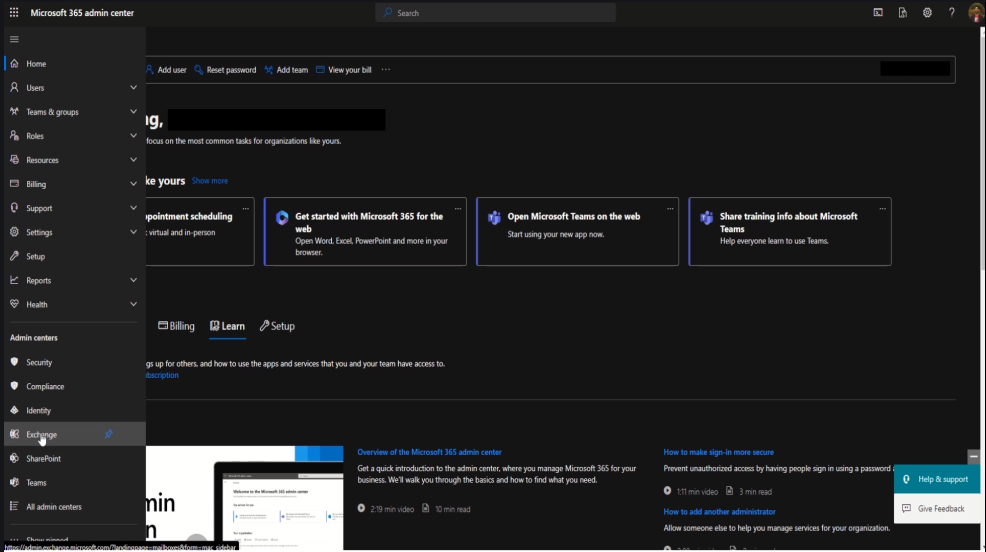
Step 1: Access the Office 365 Admin Center
Log in to your Office 365 admin account and access the admin center. You need administrative privileges to create a new mailbox.
Click on “Navigation Menu” and expand to show all menu Items by clicking “Show all“.
Under “Admin centers” section, select “Exchange“
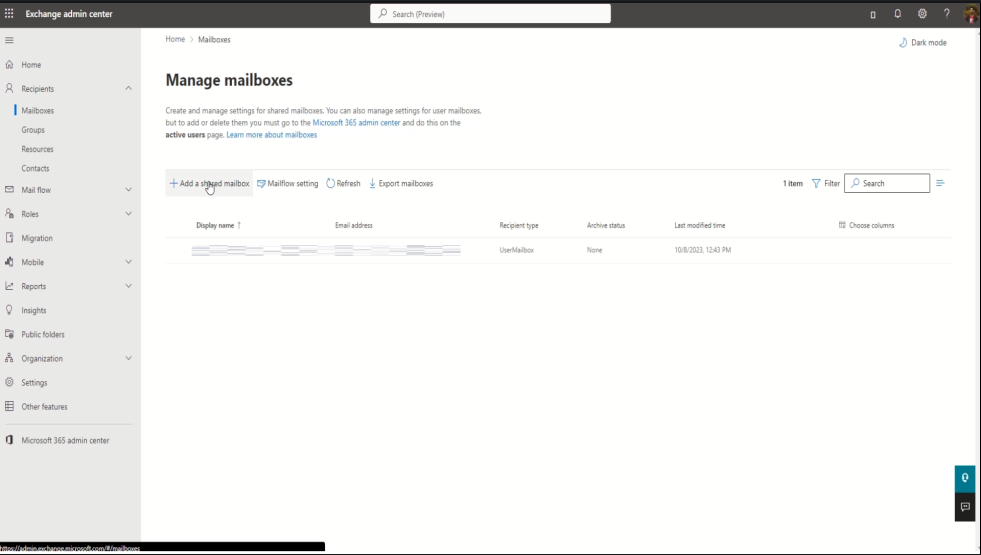
Step 2: Access the Exchange Admin Center
Expand “Recipients” section and click on “Select “Mailboxes “.
Now click on “+ Add a shared mailbox”
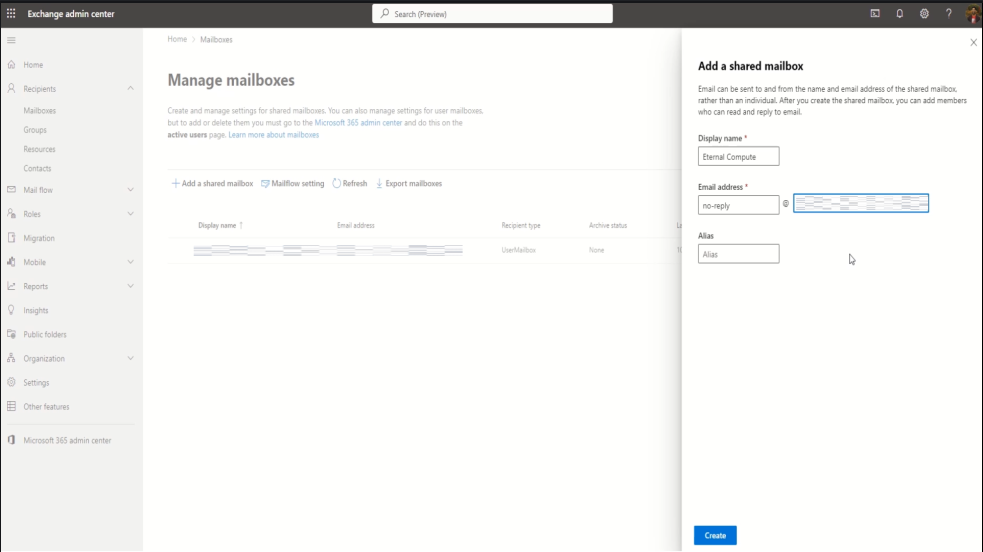
Step 3: Add Shared Mailbox Details
Fill out the mailbox details. Be sure to provide a clear name for the No-Reply mailbox and click on “Create“.
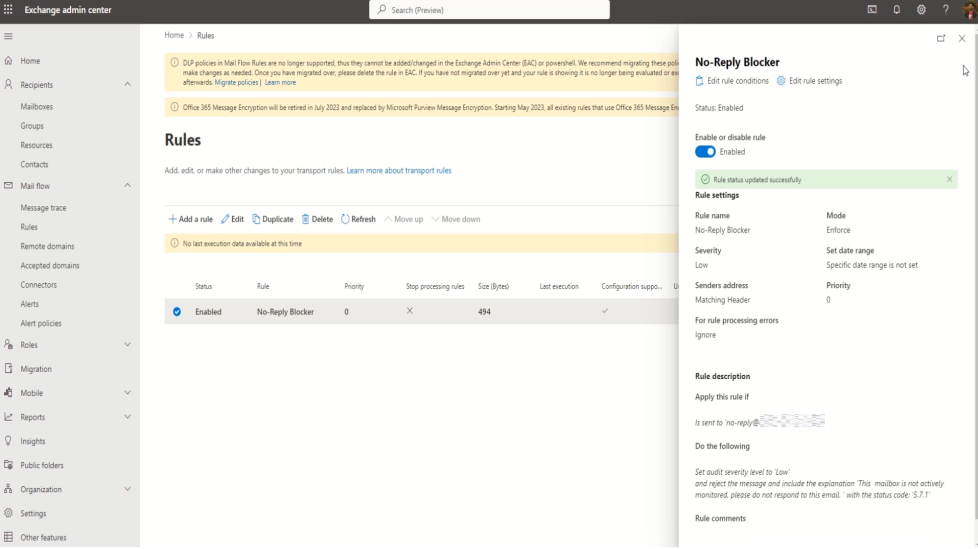
Step 4: Add rule to prevent incoming e-mails
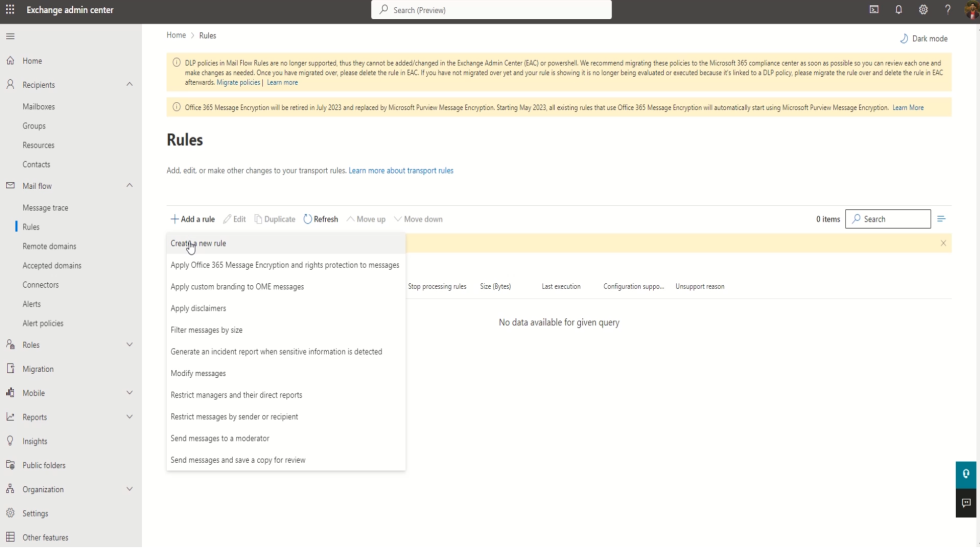
Under “Mail flow” section, click on “Rules“.
Now click on “+ Add a rule” and select “Create a new rule” from dropdown.
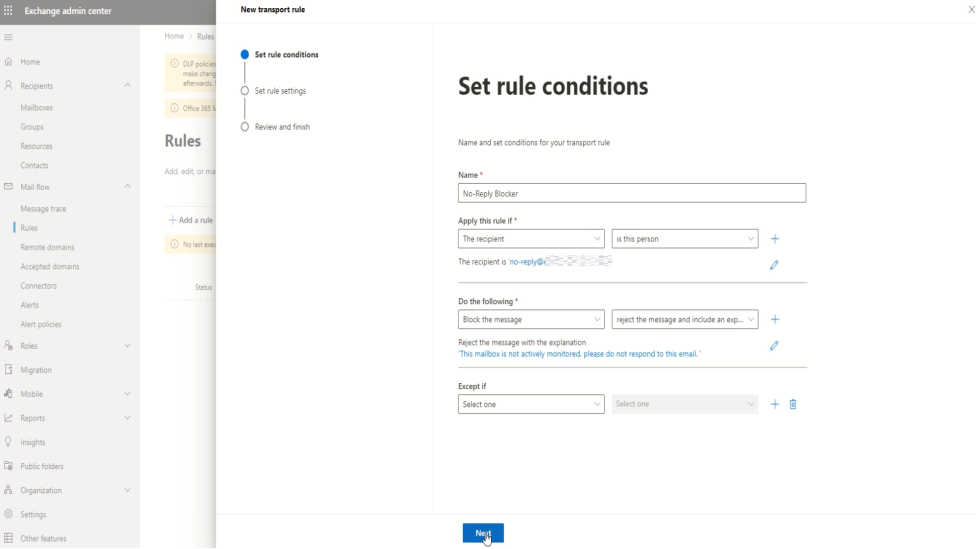
Step 5: Set Rule Conditions
Provide a relevant name to the rule. For “Apply this rule if” field, select “The Recipient” and “is this person“. From the list of users choose “no-reply” mailbox.
For “Do the following” field, select “Block the message” and “reject the message and include an explanation“. In the pop-up window specify the rejection reason and click on “Save” followed by “Next”.
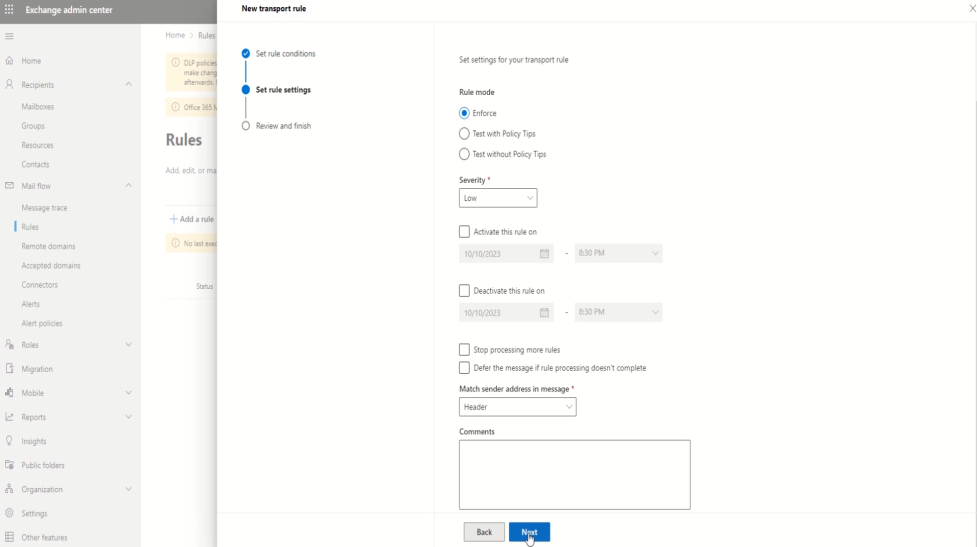
In the rule settings page, leave everything to default settings and click on “Next”.
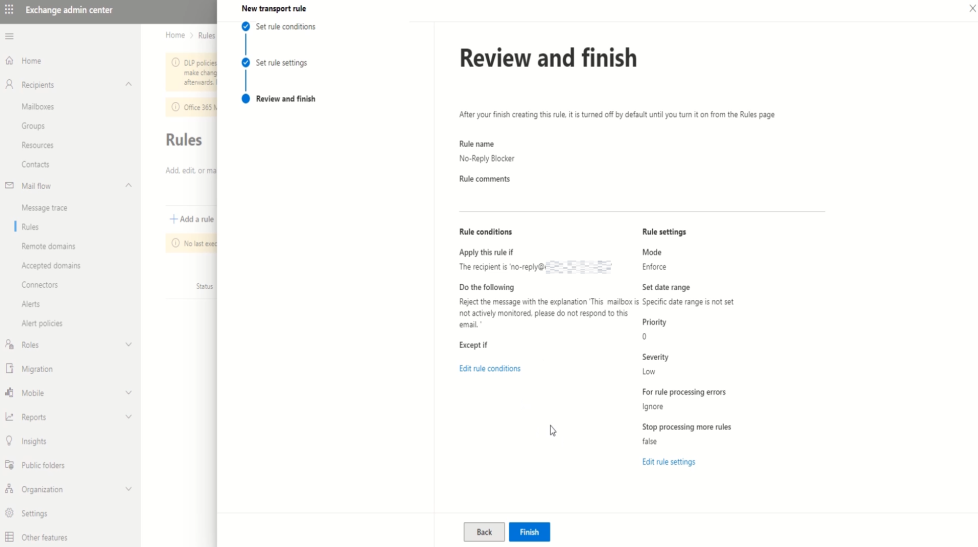
Review the entered information and click on “Finish” to create the rule, that blocks the incoming email to no-reply mailbox.
Step 6: Enable the rule
Finally click on the rule created for no-reply mailbox and click on the “Enabled” togel button to activate the rule.
Conclusion
Creating a no-reply email address in Microsoft Office 365 is a straightforward process that allows you to effectively communicate important information without expecting replies. By following the steps outlined in this guide, you can establish a dedicated no-reply mailbox and configure it to meet your specific needs. This ensures that your messages are delivered and understood as one-way communication, helping you streamline your email communication and provide clarity to your recipients.
In the next post we will show how to register application in Microsoft identity, so that your web-app can send emails using no-reply mailbox.


Leave a Reply
You must be logged in to post a comment.